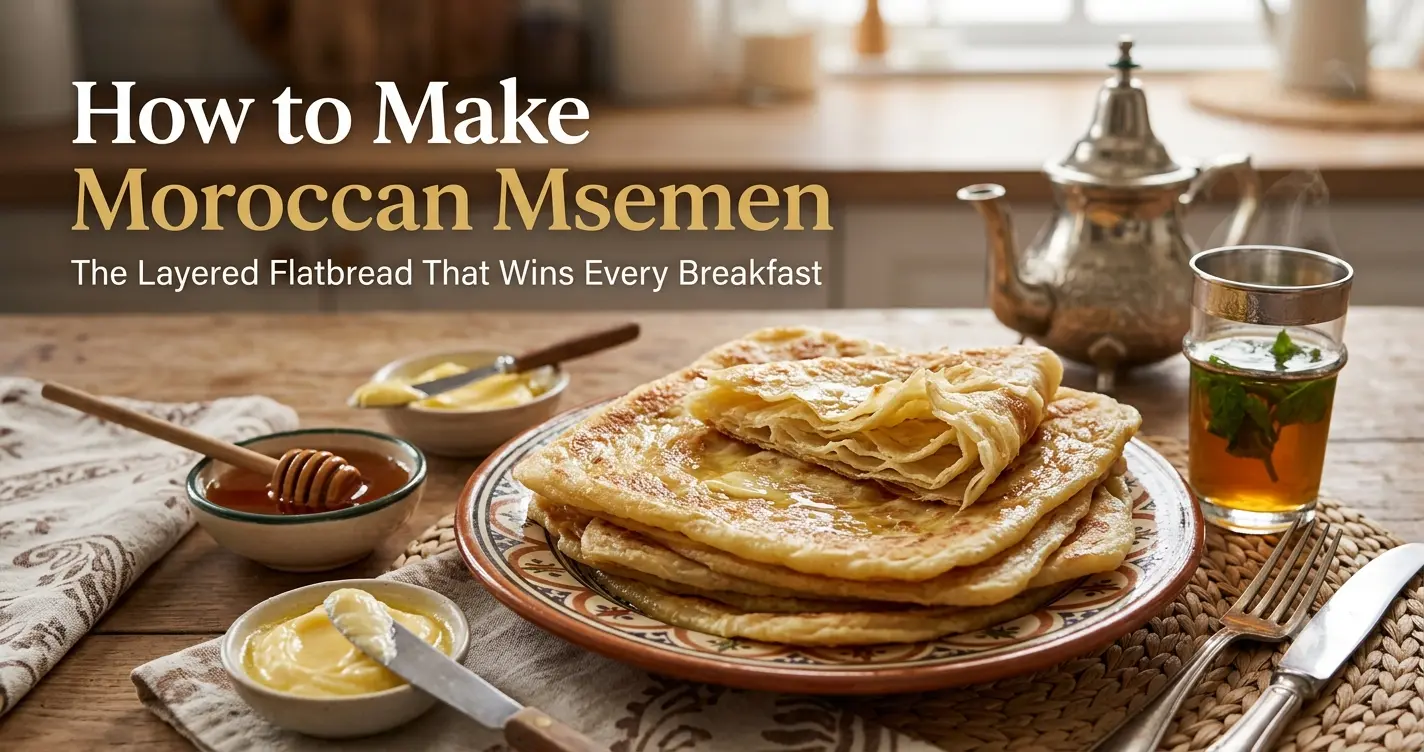
There is a sound that defines a Moroccan morning more than any alarm clock ever could. It is the soft, rhythmic slapping of dough against an oiled palm, followed by the gentle sizzle of a square of layered flatbread hitting a cast-iron griddle. That sound is the sound of Msemen being made, and if you have ever sat at a Moroccan breakfast table with a glass of mint tea in hand and a stack of these golden, flaky squares in front of you, you already know that no description will ever fully do it justice. Today, we are going to change that. On MaCooking, we have spent years teaching the world the deepest secrets of Moroccan cuisine, and Msemen is a recipe we hold especially close to our hearts. This is not just a bread. This is a ritual, a love language, and — once you master it — one of the most satisfying things you will ever pull off in your own kitchen.
Whether you are based in London, Los Angeles, Toronto, or Sydney, this guide is written specifically for you — the curious cook in a Western kitchen who wants to go beyond hummus and couscous and explore one of the most rewarding corners of North African cuisine. By the time you finish reading, you will have everything you need: the history, the technique, the troubleshooting, and the confidence to serve Msemen that would make any Moroccan grandmother nod in quiet, satisfied approval.
Chapter 1: What Exactly Is Msemen — And Why Is Everyone Obsessed With It?
Msemen (pronounced m-SEH-men, sometimes spelled M'smen or Mesmen) is a square, pan-fried Moroccan flatbread known for its extraordinary layered, honeycomb-like interior and its slightly crispy, golden exterior. It belongs to a broader family of North African laminated flatbreads, which includes its close cousins Rghaif (in Moroccan dialect, the terms are sometimes used interchangeably, though regional distinctions exist) and the Algerian Mhadjeb.
What makes Msemen unlike almost any other flatbread in the world is its preparation method. The dough is not simply rolled and cooked. Instead, it is stretched paper-thin, coated in a generous layer of softened butter and fine semolina, folded upon itself multiple times in a precise square package, and then cooked on a dry griddle until each layer separates into a tender, steaming, slightly flaky crumb. The result is a bread that is simultaneously crispy on the outside and pillowy on the inside, with layers that pull apart like pages of a delicious book.
Msemen vs. Rghaif: Is There Actually a Difference?
This is one of the most common questions we receive here at MaCooking, and the honest answer is: it depends on who you ask and where in Morocco they are from. In many households and regions, the two names are used completely interchangeably. However, some cooks make a distinction:
| Feature | Msemen | Rghaif |
|---|---|---|
| Shape | Square, neat edges | Square or slightly irregular |
| Filling | Typically plain (unfilled) | Often filled with onion, spiced meat, or herbs |
| Texture | Lighter, more layers, slightly crispier | Can be denser when filled |
| Serving context | Breakfast table staple | Street food, snack, or lunch accompaniment |
| Regional preference | Widespread across Morocco | Particularly popular in Fes and Casablanca street stalls |
For the purposes of this guide, we are focusing on the classic, unfilled Msemen — the kind that appears on the Moroccan breakfast spread alongside amlou (the divine almond-argan oil dip), fresh honey, softened butter, jben (fresh cheese), and a piping hot glass of Moroccan mint tea.
Chapter 2: A Brief History of Msemen — Bread Woven Into Moroccan Identity
To understand Msemen, you need to understand that bread in Morocco is not merely food. It is sacred. In traditional Moroccan culture, bread is treated with profound respect — you never step over a fallen piece of bread, you never throw it in the trash, and you always greet it with gratitude. Moroccan bread in all its forms — from the round, soft khobz to the semolina-heavy harcha to Msemen itself — is considered a blessing, and the act of making it is treated as a craft passed from mother to daughter, grandmother to granddaughter, over centuries.
The technique of laminating flatbreads with fat and folding them into layers is ancient and appears across the culinary traditions of the entire Maghreb — Morocco, Algeria, and Tunisia — as well as in parts of the Middle East and South Asia. The use of semolina in the dough is a direct echo of Berber (Amazigh) culinary tradition, as semolina-based breads and porridges have been central to Amazigh diet for thousands of years, long before the Arab conquests brought new culinary influences to North Africa.
The golden age of Moroccan cuisine — roughly spanning the medieval Islamic period through the reign of the great Moroccan dynasties like the Almoravids, Almohads, and Marinids — saw cities like Fes, Marrakech, and Meknes become extraordinary culinary capitals. It is in these urban kitchens, as well as in the rural hearths of the Atlas Mountains and the Rif, that Msemen evolved into the beloved form we recognize today.
What is particularly beautiful about Msemen is how democratic it is. Unlike some Moroccan dishes that require specific tagine clay or specialized equipment, Msemen needs only a flat surface, oiled hands, and a griddle. It has always been a food of the people — made in palace kitchens and rural farmhouses alike, sold on street corners at dawn, and placed at the center of the family breakfast table seven days a week.
"In Morocco, we say that a home where Msemen is made in the morning is a home where love is served with breakfast. My grandmother made Msemen every single day of her adult life. She never used a recipe. It was all in her hands."
— Chef Jamal, MaCooking
Chapter 3: Ingredients — What You Need and Why Every Single One Matters
One of the things that surprises many Western cooks when they first approach Msemen is how short the ingredient list is. This is not a recipe that hides behind a pantry full of exotic spices. Its magic is entirely in the technique. That said, ingredient quality matters enormously here, and each component plays a specific role.
The Complete Msemen Ingredient List (Makes 10–12 pieces)
- 2 cups (250g) all-purpose flour — forms the elastic base of the dough
- 1 cup (170g) fine semolina — split: some goes into the dough, some is used for dusting and layering
- 1 teaspoon fine salt
- 1 teaspoon sugar — aids yeast activity and adds a hint of sweetness
- 1 teaspoon instant dry yeast — gives Msemen a slight lift without making it bready
- Warm water (approximately 1 cup / 240ml) — added gradually; exact amount depends on flour absorption
- 4 tablespoons (60g) unsalted butter, softened to room temperature — used for the laminating layer; must be soft, not melted
- 4 tablespoons neutral oil (sunflower or vegetable) — used for oiling the work surface and your hands
- Extra fine semolina for sprinkling — the secret weapon that creates distinct, separate layers
Ingredient Deep Dives: What Western Cooks Need to Know
The Semolina Question
In Morocco, bakers typically use a very fine semolina (smida), which is considerably finer than the coarse semolina you might use for pasta. In Western grocery stores, look for "fine semolina" or "semolina flour." Bob's Red Mill makes a widely available version. If you can only find coarse semolina, pulse it briefly in a food processor to refine it slightly. Using coarse semolina without processing it will create a gritty layer between the folds rather than a silky, integrated one.
The Butter vs. Oil Debate
Traditional Msemen is made with a combination of softened butter and oil — and this is not a compromise, it is a deliberate choice. The butter provides rich flavor and helps the layers develop their characteristic color and slight crispiness when cooked. The oil keeps the butter from becoming too dense and helps the dough stretch more easily. Some modern recipes use only oil, some use smen (Moroccan preserved butter, which has a funky, aged quality similar to ghee but more pungent). For your first time, plain unsalted butter is perfect.
Do I Really Need Yeast?
Some traditional recipes for Msemen do not use yeast at all, relying purely on the lamination technique to create texture. Others use a small amount of yeast to give the bread a slightly airier, lighter interior. At MaCooking, we prefer the yeast version for home cooks because it is slightly more forgiving and produces a more tender result. The amount used here is small enough that you will not taste it, but your layers will thank you for it.
Chapter 4: The Step-by-Step Msemen Method — Every Detail That Changes Everything
This is where we get serious. Msemen is not a difficult bread, but it is a technique-driven bread, and there are several points in the process where a small mistake can mean the difference between flaky, layered perfection and a dense, doughy disappointment. Read through the entire method once before you begin. Then read it again.
Step 1: Making the Dough
- In a large mixing bowl, combine the all-purpose flour, half of your fine semolina (about 85g), salt, sugar, and instant yeast. Whisk them together thoroughly.
- Add warm water gradually — start with about three-quarters of the amount and mix with your hands. The dough should come together into a shaggy mass. Keep adding water until you have a soft, slightly sticky dough that is not falling apart but is nowhere near firm.
- Turn the dough out onto an unfloured surface (this is important — flour makes it harder to develop gluten). Knead vigorously for 10 full minutes. The dough should transform from rough and shaggy into something smooth, elastic, and almost silky. It will still be slightly tacky — that is correct. Do not be tempted to add more flour.
- Form the dough into a ball, place it back in the bowl, cover with a damp cloth, and let it rest for 20–30 minutes. This rest is not about rising; it is about relaxation. The gluten needs to settle so the dough can be stretched without springing back.
Step 2: Portioning the Dough
- Pour a generous amount of neutral oil onto your work surface and spread it around. Oil your hands thoroughly.
- Divide the rested dough into 10–12 equal balls, roughly the size of a large walnut or a golf ball. Each ball should weigh approximately 60–70 grams if you want to be precise.
- Place all the dough balls on the oiled surface, cover loosely with plastic wrap or a damp cloth, and allow them to rest for another 15 minutes. This second rest is crucial — it relaxes the dough further and makes the stretching phase dramatically easier.
Step 3: The Laminating Technique — The Heart of Msemen
This is the step that intimidates people, and this is the step that, once mastered, makes you feel like an absolute kitchen magician. Take a breath. You have got this.
- Prepare your laminating mixture: in a small bowl, combine the softened butter with 1 tablespoon of neutral oil and mix until smooth and spreadable. Keep your remaining fine semolina in a small bowl nearby.
- Take one dough ball and place it on your oiled work surface. Using your fingertips (not a rolling pin — at least not yet), press it out from the center outward into a thin circle or oval. As it becomes thinner, use your palms to gently stretch it further.
- Now comes the signature move: using your fingertips, continue stretching the dough until it is almost translucently thin — you should be able to see shadows through it. It does not need to be perfectly round. Think of it like stretching strudel dough or filo pastry. Work quickly and confidently. If it tears slightly, that is fine; just pinch the tear together.
- Spread a thin, even layer of the butter-oil mixture across the entire surface of the stretched dough using your fingertips.
- Sprinkle a light but even dusting of fine semolina over the buttered surface. This is what creates the distinct separation between layers when the Msemen cooks.
- Now fold: fold one side of the dough toward the center (one-third of the way), then fold the opposite side over it — you now have a long rectangle. Then fold the top of this rectangle down to the center, and fold the bottom up over it, creating a neat, compact square package.
- Set the folded square aside on a lightly oiled tray and cover it. Repeat with all remaining dough balls.
- Once all squares are formed, let them rest for 10–15 more minutes. During this time, they will puff slightly and the layers inside will relax. Do not skip this rest.
Step 4: The Second Flatten and Cook
- Heat a large, heavy-bottomed griddle or cast-iron pan over medium heat. Do not add any oil — Msemen is cooked on a dry griddle. The oil inside the bread is enough.
- Take one of your rested squares and place it on your oiled work surface. Using your palm (or a rolling pin if needed), gently press and flatten it into a thin square, roughly 15–18cm (6–7 inches) across. Work from the center outward. Be gentle — you want to maintain those beautiful layers inside, not crush them together.
- Place the flattened Msemen on the hot griddle. Cook for approximately 3–4 minutes on the first side — you are looking for golden-brown patches and a slightly puffed appearance. Flip and cook the second side for another 2–3 minutes.
- The finished Msemen should be golden and slightly charred in spots on both sides, with a surface that feels firm to the touch but gives slightly when pressed. Transfer to a clean cloth or rack.
- Serve immediately, or stack them (covered with a cloth) to keep warm. They are best eaten fresh but can be reheated on a dry pan for a minute each side.
Griddle Temperature: The Most Common Mistake
Getting the heat right is the single most impactful variable in Msemen cooking. Too hot, and the outside burns before the inside cooks through. Too low, and the bread becomes pale and dense, almost steamed rather than griddled. Medium heat — where a drop of water flicked onto the surface evaporates in about 3 seconds — is your target. If you are using an electric stove, preheat the pan for at least 5 minutes before cooking your first Msemen.
Chapter 5: Troubleshooting Guide — When Things Go Wrong and How to Fix Them
Even experienced cooks encounter challenges with Msemen the first few times. Here is an honest breakdown of the most common problems and their solutions:
| Problem | Likely Cause | Solution |
|---|---|---|
| Dough tears when stretching | Insufficient rest time, over-kneaded, or dough too dry | Let dough rest longer (up to 45 min), ensure dough is soft and slightly tacky, oil your hands generously |
| No visible layers after cooking | Not enough butter/oil during laminating, or dough not stretched thin enough | Be more generous with the butter layer; stretch the dough almost translucently thin before folding |
| Msemen is raw inside | Dough too thick, or heat too high causing exterior to cook before interior | Flatten more aggressively before cooking; reduce heat to medium-low and cook longer |
| Msemen is dense and doughy | Skipped resting periods or used too much flour | Follow rest times strictly; avoid flouring the work surface — use oil instead |
| Bread sticks to griddle | Griddle not hot enough, or pan surface too rough | Preheat griddle properly; use a well-seasoned cast iron or non-stick pan |
| Layers separate completely and bread falls apart | Too much butter or oil, or dough stretched too thin in spots | Use less butter for laminating; ensure dough is even, not paper-thin in places |
| Dough springs back when stretching | Gluten too tight — insufficient rest | Cover and rest for another 10–15 minutes before trying again |
Chapter 6: Variations, Fillings, and Creative Serving Ideas
Once you have mastered the classic plain Msemen, a whole world of variations opens up. In Morocco, Msemen creativity tends to express itself through fillings added during the folding stage, or through the accompaniments served alongside. Let us explore both dimensions.
Traditional Filled Msemen (Msemen Mâammer)
The filled version — sometimes called Mâammer or stuffed Rghaif — is one of Morocco's most beloved street foods. After stretching the dough thin and applying the butter layer, you add a filling before folding. Popular traditional fillings include:
- Kefta filling: Spiced ground beef or lamb mixed with finely minced onion, chopped parsley, cumin, paprika, cayenne, and salt. This is perhaps the most popular street food version, sold from stalls at dawn in cities like Casablanca and Marrakech.
- Onion and herb filling: A vegetarian option using very finely diced onion, fresh parsley, dried thyme, cumin, and a pinch of chili. The onion must be chopped as fine as possible — almost minced — or it will create steam that prevents the layers from developing properly.
- Cheese and herb: A modern take using crumbled feta or fresh goat cheese with chopped herbs. Particularly popular among younger Moroccan cooks in cities like Rabat.
- Sweet almond: Ground almonds mixed with a touch of honey, cinnamon, and a tiny pinch of salt. Served as a dessert or a special breakfast treat.
Modern Western Kitchen Adaptations
- Msemen Quesadilla: Fill with shredded mozzarella and smoked paprika chicken before folding. Cook until cheese is melted and golden. A crowd-pleaser at brunch parties.
- Breakfast Msemen: Serve topped with a fried egg, sliced avocado, a drizzle of harissa, and fresh cilantro. Honestly, this needs to be on every brunch menu in the Western world immediately.
- Msemen with Za'atar Butter: Mix softened butter with za'atar and use it as your laminating layer instead of plain butter. The herbs get toasted into the layers during cooking — extraordinary.
The Traditional Moroccan Breakfast Spread: What to Serve With Msemen
Msemen does not appear alone on a Moroccan breakfast table. It is the star of an ensemble, and understanding the full spread is part of understanding the bread. The following accompaniments are traditional:
- Amlou: A thick, luscious dip made from toasted almonds, argan oil, and honey, ground together into a rich paste. If you have never tried Msemen dipped in amlou, you have a life-changing experience ahead of you.
- Raw honey: Moroccan honey, especially thyme or euphorbia honey, is intensely flavored and aromatic. Drizzle it directly onto a torn piece of Msemen.
- Fresh butter (zebda): Slightly salted Moroccan-style butter, spread generously on a hot piece of Msemen so it melts into the layers.
- Jben: Fresh Moroccan cheese, mild and slightly tangy. Substitute fresh ricotta or fresh goat cheese if you cannot find it.
- Moroccan mint tea (Atay): Gunpowder green tea steeped with a generous amount of fresh spearmint and sweetened heavily with sugar, poured from a height to create a frothy top. Non-negotiable.
- Argan oil: Plain, culinary-grade argan oil for dipping — nutty, complex, and utterly unlike anything else in the world of edible oils.
Chapter 7: Storage, Make-Ahead Tips, and Freezing Msemen
One of the practical beauties of Msemen is that it is exceptionally well-suited to batch cooking. Here at MaCooking, we always recommend making a large batch on the weekend and storing it for weekday breakfasts. Here is everything you need to know about storing Msemen properly:
Same-Day Storage
If you have made more Msemen than you can eat in one sitting, let them cool completely on a wire rack (do not stack them while hot — the steam will make them soggy). Once cool, stack them with a small piece of parchment paper between each one and store in an airtight container at room temperature for up to 24 hours. Reheat on a dry griddle over medium heat for about 1 minute per side — they will taste almost as good as fresh.
Refrigerating Msemen
Cooked Msemen can be refrigerated for up to 3 days. The texture becomes slightly firmer in the fridge, but a brief time on a hot griddle brings them right back to life. Avoid microwaving them — it makes them rubbery and destroys the layered texture.
Freezing Raw Folded Msemen (The Best Method)
This is the real game-changer for busy households. After you have folded your Msemen into their square packets (before the final flattening and cooking), place them on a parchment-lined tray and freeze until solid — about 2 hours. Transfer the frozen squares to a zip-lock freezer bag. They will keep in the freezer for up to 3 months.
To cook from frozen: remove from the freezer the night before and let thaw in the refrigerator overnight, or at room temperature for about 1 hour. Then flatten and cook as normal. The results are indistinguishable from freshly made.
Freezing Cooked Msemen
Already-cooked Msemen also freeze well. Cool completely, separate with parchment paper, freeze in a bag for up to 2 months. Reheat directly from frozen in a dry pan over medium-low heat, covered, for about 3–4 minutes per side.
Chapter 8: The Cultural Significance of Msemen Today — A Living Tradition
Walking through the medina of Fes at six in the morning, you will see Msemen being made in bakeries that have been in the same family for four generations. The baker — almost always a woman in the domestic context, though men dominate the commercial bakeries — works with the kind of effortless speed that only comes from having made the same thing ten thousand times. She does not measure. She does not look at a recipe. Her hands know the dough the way a musician knows their instrument.
In recent years, Msemen has begun attracting genuine international attention. Moroccan food has been somewhat overshadowed in the global culinary conversation by other regional cuisines — Lebanese, Turkish, Israeli — despite being arguably one of the world's most sophisticated and complex food traditions. But this is changing. Moroccan restaurants are opening in New York, London, Paris, and Melbourne. Food tourists are putting Marrakech on their culinary travel lists. And platforms like MaCooking are working to ensure that when the world discovers Moroccan cuisine, it discovers it authentically — not a diluted, simplified, or misrepresented version, but the real thing, with all its depth, nuance, and generosity.
Msemen is the perfect ambassador for this mission. It is approachable — the ingredients are cheap and widely available, the equipment requirements are minimal, and the learning curve, while real, is not steep. But it is also deeply, unmistakably Moroccan. Every fold, every layer, every sizzle on the griddle carries centuries of culture.
When you make Msemen in your kitchen in Manchester or Montreal or Melbourne, you are participating in something much larger than a breakfast routine. You are learning a language that has been spoken in Moroccan homes since before your country had a name. That is worth something.
Frequently Asked Questions About Moroccan Msemen
Q1: My Msemen dough is too sticky and I cannot work with it. What am I doing wrong?
A sticky dough is actually a sign that you are on the right track — Msemen dough should be softer and stickier than bread dough. The key is to not add more flour, which will make your Msemen tough and dry. Instead, oil your hands and your work surface generously before handling the dough. The oil prevents sticking without tightening the gluten structure. If your dough is so sticky it is genuinely unworkable even with oiled hands, you have likely added too much water — but this is a rare problem. More commonly, cooks struggle because they are trying to handle sticky dough with dry hands on a dry surface. The solution is always: more oil, not more flour.
Q2: Can I make Msemen without semolina and use only all-purpose flour?
Yes, you can make Msemen with 100% all-purpose flour, and it will still be delicious. However, you will lose some of the characteristic texture. The fine semolina in the dough adds a slight graininess that gives each layer more definition, and the semolina sprinkled between the layers during lamination is what physically separates them during cooking. If you cannot find fine semolina, substitute with very fine cornmeal or simply use extra flour for the dusting step — but do try to source semolina. It is widely available in Middle Eastern, Italian, and South Asian grocery stores, as well as on Amazon.
Q3: How do I know if my Msemen is properly cooked all the way through?
The most reliable test is pressing the center of the Msemen gently with your fingertip after it has cooked on both sides. A properly cooked Msemen will feel firm at the edges, slightly springy in the center, and will not leave a doughy indentation when pressed. If the center feels soft and yielding like raw dough, flip it back to the first side, reduce your heat slightly, cover the pan with a lid for 1–2 minutes to create some steam heat, then uncover and cook uncovered for another minute. Visual cues are also helpful: a cooked Msemen will have golden-brown patches on both surfaces, and if you lift an edge, you should see distinct, separate layers in the interior.
Q4: Is Msemen vegan? Can it be made without butter?
Traditional Msemen is not vegan because it uses butter in the laminating layer. However, it is very easily made vegan with excellent results. Simply replace the butter with the same quantity of coconut oil (refined, not virgin, to avoid a strong coconut flavor) or a high-quality vegan butter. The technique remains identical. The result will be slightly less rich-tasting but still beautifully layered and absolutely delicious. In fact, some traditional Moroccan recipes use only oil — no butter — for the laminating layer, so there is historical precedent for this approach as well.
Q5: How is Msemen different from Indian paratha or Turkish gözleme?
This is a wonderful question that speaks to one of the most fascinating patterns in global food history: the independent development of laminated flatbreads across cultures. While Msemen, paratha, and gözleme all involve a dough stretched thin, coated with fat, and folded, they are distinct in several important ways. Paratha typically uses ghee (clarified butter) and is cooked with oil on a tawa (griddle), giving it a richer, crispier exterior. Gözleme is rolled very thin, filled, then cooked on a convex sac griddle, and has a much crispier, crêpe-like texture. Msemen sits somewhere between the two — more substantial than a gözleme, lighter and chewier than a paratha, with a characteristic honeycomb interior created by the semolina dusting between layers. The flavor profile is also uniquely Moroccan: subtler, more delicate, designed to complement rather than overpower its accompaniments.
Conclusion: Your Moroccan Breakfast Table Awaits
There is a certain kind of satisfaction that only comes from making something with your hands that people have been making — essentially the same way — for hundreds of years. Msemen is that kind of recipe. It will take you a batch or two to find your rhythm, to understand how the dough should feel under your oiled palms, to learn how thin is thin enough and how long to leave it on the heat. But once you have it, you have it for life. It becomes muscle memory. It becomes a gift you can give to your family every weekend morning without it ever feeling like a chore.
Start with the classic version. Get comfortable with the stretch, the fold, the griddle. Then experiment — fill them with spiced kefta, dip them in amlou, pile them beside a pot of mint tea. Invite people over and watch their faces when they pull the first layer from a stack of freshly cooked Msemen. That reaction — wide eyes, immediate reaching for more — never gets old.
At MaCooking, our mission has always been to make authentic Moroccan cuisine accessible to every kitchen in the world, without ever compromising on the depth, the history, or the technique that makes this food extraordinary. Msemen is exactly the kind of recipe that embodies that mission: humble in its ingredients, profound in its execution, and endlessly generous in what it gives to the people who eat it.
So clear your Sunday morning, oil your hands, and make Msemen. Your breakfast table will never be the same again — and we mean that in the best possible way.
Explore more authentic Moroccan recipes, techniques, and culinary deep-dives at macooking.com — your definitive guide to the flavors of Morocco, wherever in the world you are cooking.